
When I left off the previous post, the bound buttonholes were completed. As I have said in other posts, once I get bound buttonholes done with no mishaps I always feel that any project is downhill from there. Now let's talk interfacing. And if I had a sewing motto it would be "more interfacing". Most sewing patterns or books give general info on using interfacing but I pretty much use it on every part of the lapel, collars, facings, pockets, hem, sleeves and other spots that might need some support or stabilization.
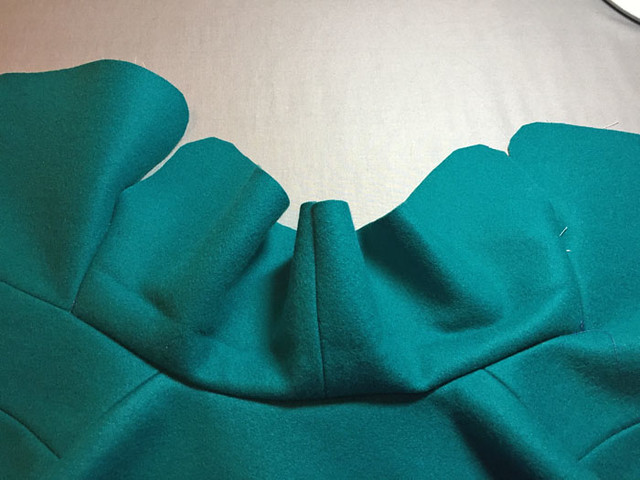
Here's the collar, where I have determined the roll line and added extra interfacing to get it to roll over properly. To review, I am using Simplicity 2311 which is a really great coat pattern and one which I previously used to make a black full-length wool coat, first post for that coat here where you can see I figured out where the collar roll line was on the muslin. Now for my repeated refrain: why don't pattern companies include this as they used to? See older Vogue patterns - it was there.
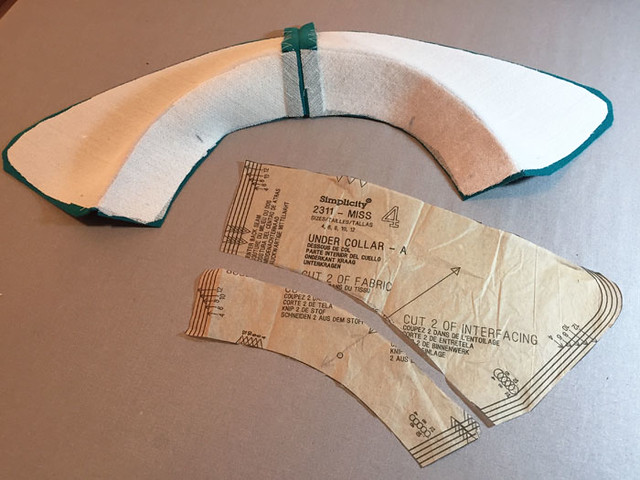
Using a double layer of interfacing to support the bottom part of the collar stands in for doing the hair canvas and pad stitching method. Then I pinned the under collar on my tailor's ham and steamed it in place, then left it to cool and dry with the crease.
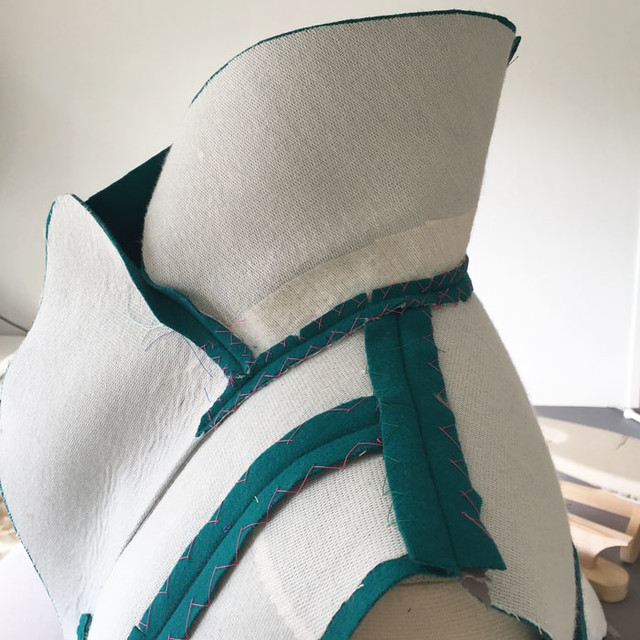
Next up, stitching the undercollar to the jacket.
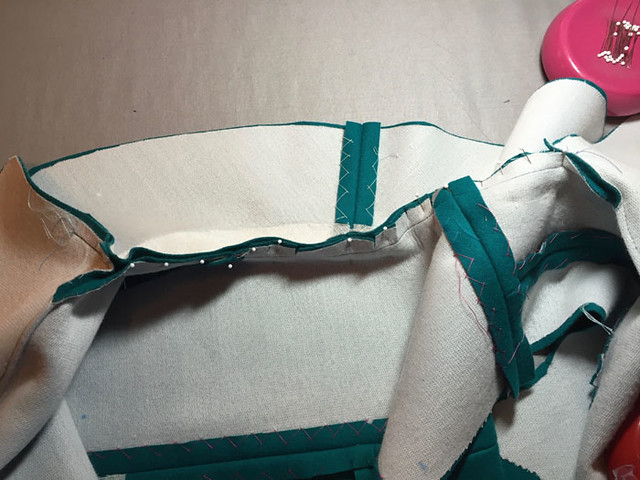
I do it in sections, stopping at the junction (typically the large dot) where the back neckline and lapel meet.
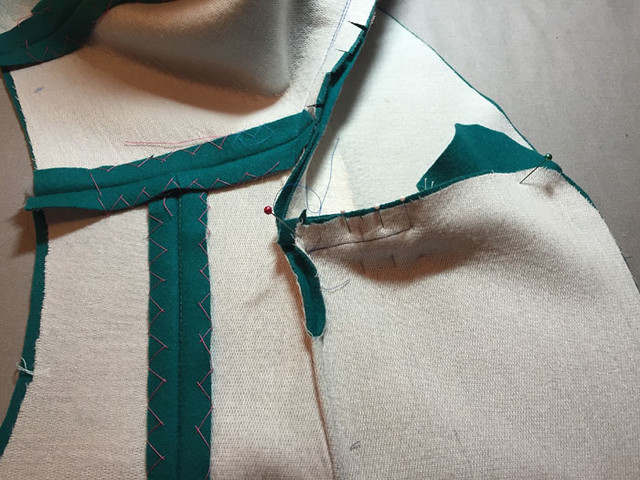
Note that most of the seams are catch-stitched down after pressing. To me that makes such a difference for the inside of the garment, and thus the outside, keeping the seam allowances from moving around and keeping everything flat on the outside.
Here is that seam before pressing. You can really see how the under collar will fold over nicely due to shaping the roll line.
Next up, pressing and trimming that seam, and then catch-stitching it down as well. Using silk thread, and only stitching it to the interfacing so it is quite easy to do and a worthwhile step.
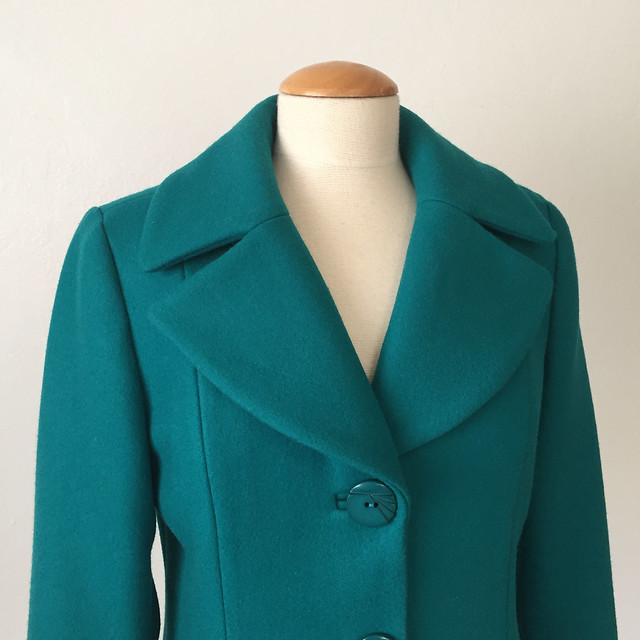
I like how this pattern has a dart that creates the inside lapel corner on the coat front. I have a Vogue jacket sewn a few times (used in my jacket series starting here) with that same dart feature. It gives a nice feminine shape to the jacket front without a side bust dart.
Now to one of my favorite parts - trimming. And so important! Anything with a scissors I find so enjoyable (cutting fabric, cutting my garden roses, cutting my hair - ok - that last one is much to the dismay of my stylist) Everyone has some little sewing task that they find gives them pleasure - I just like snipping and trimming.
Seam allowance grading - it takes some 3D visualization to review which side of the seam allowance will end up on top of the garment, and that one is always the larger by 1/8". Does this make sense? I might have a topic for a future post here...
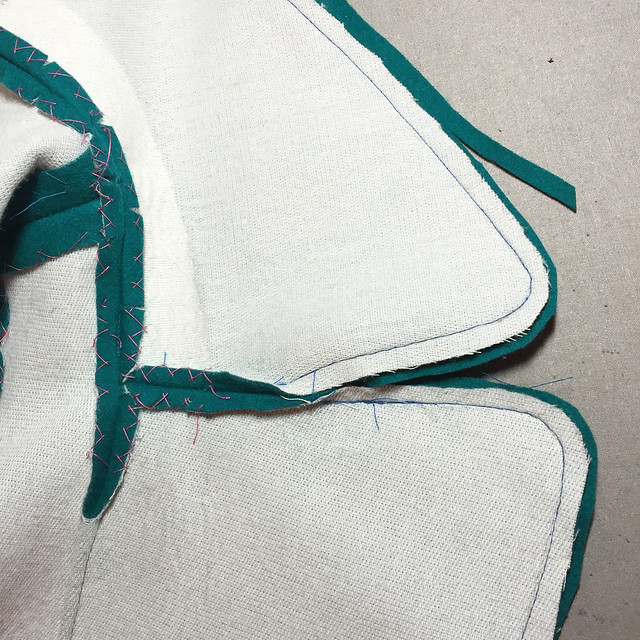
And then for the corner curves, on this think fabric it is entirely necessary to cut the triangle wedges out of the fabric so that when the corner is flipped they squeeze back together and don't leave any lumps or ripples. I think this takes a little bit of practice and ability to gauge how the fabric behaves. You don't want a saw-tooth effect showing through but you also want to remove the extra bulk.
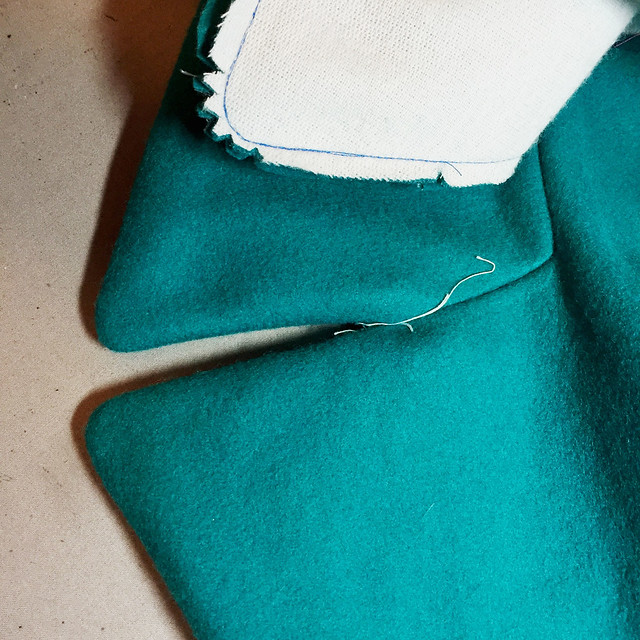
I took this picture to show one lapel all trimmed but as yet unpressed on the outside, juxtaposed with the trimmed inside lapel. I didn't take a picture of one crucial step which is to press the seam allowance open. However if you look at my jacket series (I will list links below) you can see what I mean.
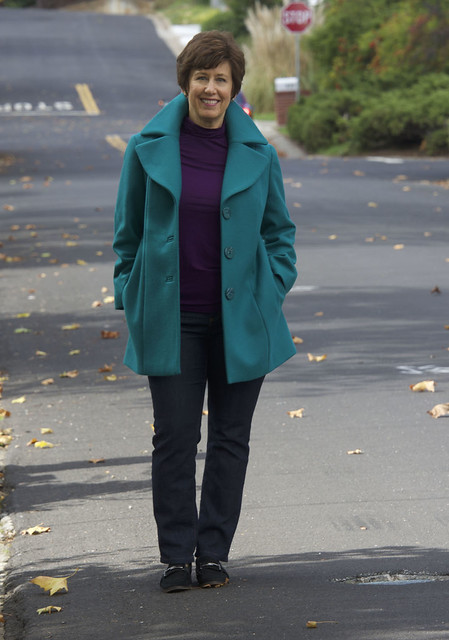
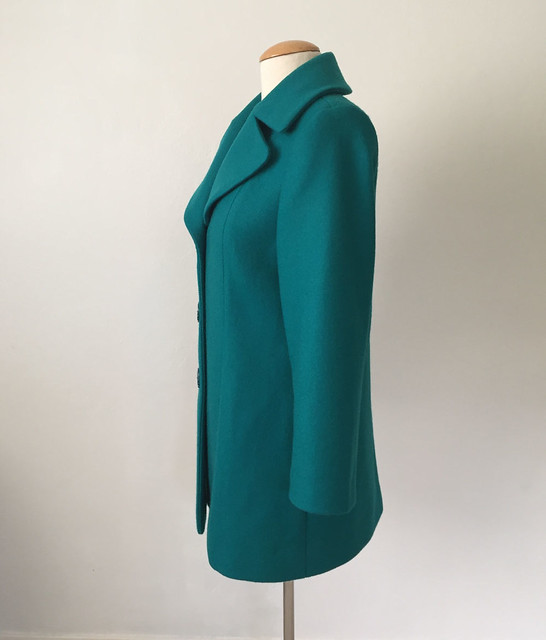
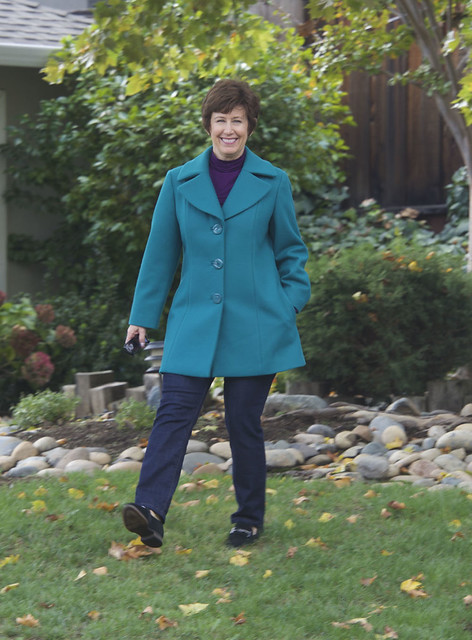
That's it for construction photos on this project - here is the coat on the dress form. I'm not entirely sure about the length - maybe it could have been a bit shorter - more like a jacket but this will do, and I'm not changing it now.
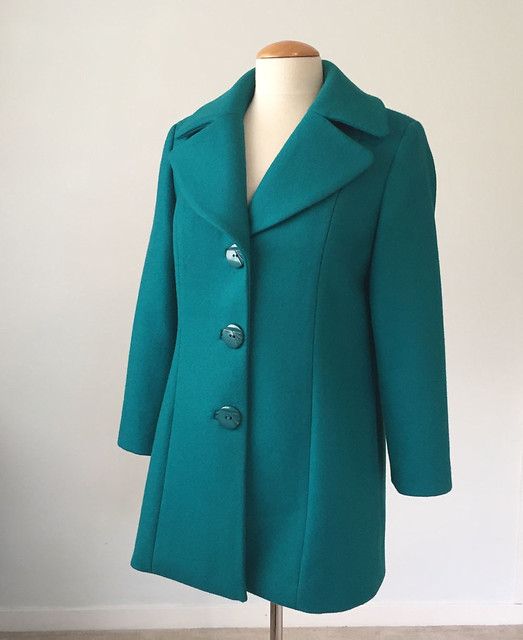
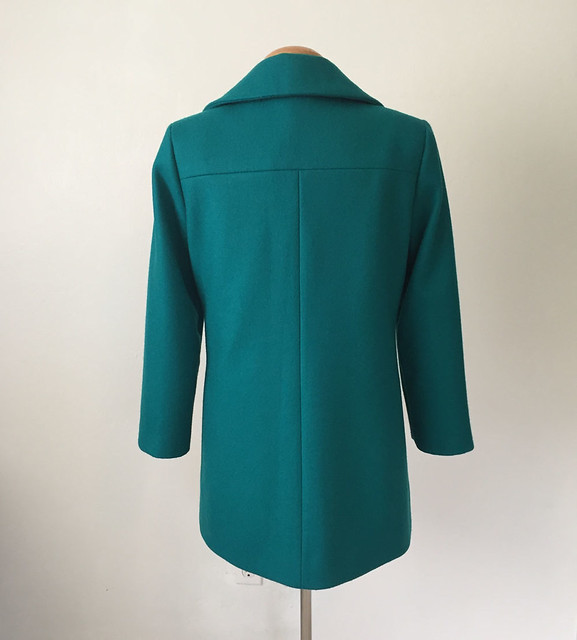
When I made the first version of this coat, in black wool I thought it was a bit boxy so I put long vertical waist darts in the back for shaping. They really don't show in that fabric. For this version I wanted a more boxy peacoat style so left them off.
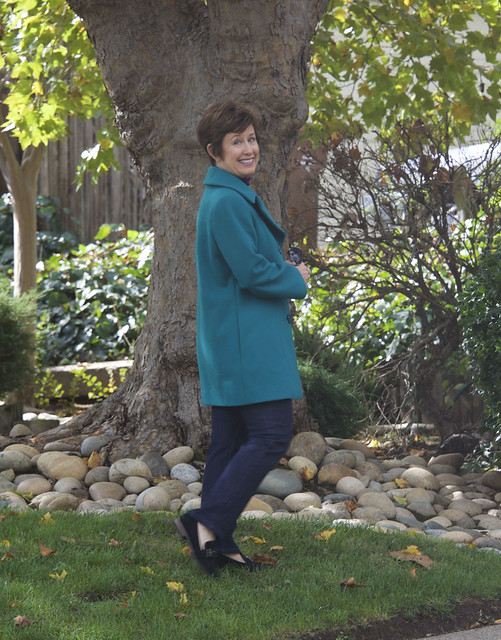
Slightly cartoony facial expression here - but you can see the length and shape.
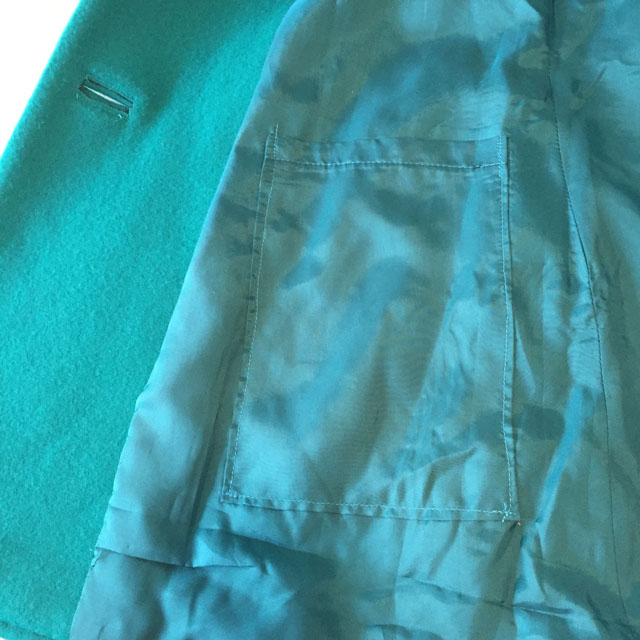
Oh yeah, another inside detail. I put deep patch pockets on either side of the front. I actually got out my wallet, sunglasses, cell phone etc and decided on how big I could make these while not distorting the front of the coat. Success! I stuffed so much in these pockets when I was in New York. Sunglasses, wristlet wallet, scarf, cash. Very handy and so great not to carry a big purse. I was kind of rushing to finish this coat before that trip, a little velcro or even a lightweight zipper at the top would make them even better.
The front lawn is greening up after our super dry summer - this rain lately is so welcome although taking these photos the temp was near 70˚. Not exactly wool coat weather but at least the leaves are beginning to fall.
I am so happy with these buttons, could the color be any more perfect? I got them at Stone Mountain in Berkeley. Also bought the lining there too, ambiance rayon in the perfect shade. They have the best selection of lining in every color. Initially I was planning to put gold buttons - but I think these look just right.
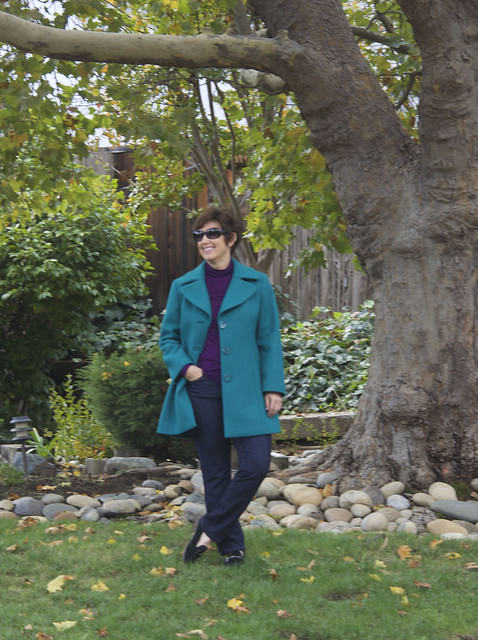
Not quite succeeding at the "so cool I have to wear shades" look. But ready for the weather to get chilly so I can wear this coat some more.
Here are a few links for things I mentioned in this post or might be of interest.
- Black wool coat using this pattern, Simplicity 2311
- Jacket tailoring in depth series, 7 posts in total, starting here with first post
- Further details on buttonholes and button sewing
- This post has some info on that front hem corner.
I highly recommend this Simplicity pattern (2311) which finally appears to be OOP, however there seem to be lots of copies available on eBay. It is an easy pattern to sew and the proportions are great for a warm winter coat.
That's it for coats for Fall 2016 - Winter 2017. So I say, ha ha. OK, no more coats - but jackets, yes. I just opened Vogue 1526 earlier today for a quick look. I might recreate the same version as is on the pattern envelope, since I bought a red wool at Metro Textiles in NY that would be perfect. It looks quick to sew, with no sleeves and in seam buttonholes. Like I said, we just need some wintery weather to wear these things.
In other projects, I am playing around with pattern adaption to make a tie neck blouse. I don't see the need to buy a pattern for that and I love manipulating shirt patterns to create different looks.
Also I have a Random Threads post in the works and feel a Pattern Whisperer post coming on.
Pondering a couple of different topics - party dresses are a perpetually popular category but what about party blouses? Meaning a blouse in a dressy fabric - something not for work but for wearing to a party or evening out - with pants (warmer and more comfy) plus quicker to sew. Chime in on your requests for the Pattern Whisperer category. The holidays are fast approaching and we need to get sewing for upcoming festivities.
It's supposed to rain here Monday evening which would be the first in a long time - Soggy trick or treaters plus a week night has me hoping it will all be wrapped up by 8pm or so. We can hope.
Happy Halloween,
Beth
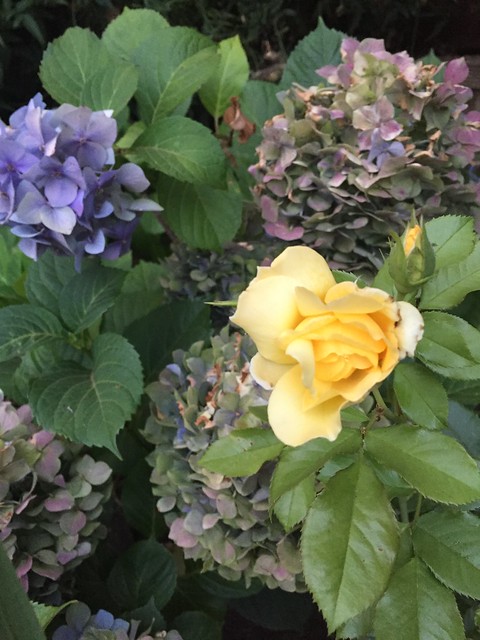
today's garden photo, which I took some weeks ago when the hydrangeas were starting to turn dry and autumnal, but a few roses were still blooming.


You do impeccable work. The coat is perfect, and the color is so vibrant.
ReplyDeleteAbsolutely gorgeous!
ReplyDeleteAbsolutely gorgeous!
ReplyDeleteReally fantastic! The finished coat is beautiful. I'm going to refer back to your posts when I eventually tackle a coat properly, your blog is so informative.
ReplyDeleteThat is one good looking coat. Thank you for a really informative post, I will bookmark it as it will be really helpful when I start my coat, just waiting for everything to arrive in the post. The pencil tip for sewing on buttons is good too, as finding something with sufficient "depth" is always a problem
ReplyDeleteWhat a lovely coat. I think the length is just right - in that nice warm fabric it might look too bulky if shorter. The buttons are splendid. One quick question. When cutting notches in a seam allowance I was told that it is better to stagger them rather than cut them at the same place in both the seam allowances. That way you don't get narrow fabric on both sides of the stitching and so the seam is stronger. Any thoughts on that?
ReplyDeleteAnne
yes I suppose you could stagger then but hopefully you cut out the right pie shape wedges that go back together and fill in the triangle spaces when you turn it right side out. Hope that makes sense.
DeleteStunning and what a luscious color and fabric. Your sewing is always exquisite, I appreciate your attention to technique and detail. And thks for all the sewing notes.
ReplyDeleteThe kind of post I really enjoy to read! I love making coats and all this details are great for me !Love the color too!
ReplyDeleteYour coat is so gorgeous! It looks like a high end bespoke piece, but then again, everything you make does. I love seeing the insides of coats and learning more about coat and jacket construction as its something that I haven't done much of, although I'm sewing a wool coat this week. Those buttons also match so perfectly.
ReplyDeleteI love those the wide lapels! Just going to say that the drying hydrangeas are really beautiful colors in the photo too.
ReplyDeleteGorgeous! I never realized you would need to interface the entire coat! Do you do it all the time or does it depend on the fabric weight? I think those buttons look much better than gold
ReplyDeleteI didn't interface the whole coat as it would be to bulky and stiff, just the lapels, collar, facings, hems. If it is a really lightweight fabric and I want it to behave like a coat fabric then I might interface the whole thing.
DeleteImpressive! What did you use for the underlining?
ReplyDeleteYes to "party blouses"!!!
ReplyDeleteI love the coat. It's beautiful.
This coat is perfect!! Those seams look so smooth and beautiful. I had to just stare at the dress form pics for a moment! I love this color as well, and that you consider it a neutral :)
ReplyDeleteBravo! And more! Can't wait to come back to your blog when I want to tackle a coat.
ReplyDeleteBeautiful coat, and the buttons are indeed perfect! I think the length is just right, too. Would love a "pattern whisperer" on party blouses!!
ReplyDeleteWow, your jacket is stunning. Perfection!
ReplyDeleteTrimming seams makes all the difference in the perfect pressing! Thanks for showing the wedges cut out! I too prefer to see "inside" shots that are so so important in the final results. Killer color and superb techniques add up to a wonderful jacket...WOW! Your Halloween rain headed our direction but held off the the little monsters and ghouls. My hydrangeas are still hanging in there too before the first frost hits this month.
ReplyDeleteBeautiful coat Beth. So great to make a second coat from the perfected pattern. Those lapels look perfection!
ReplyDeleteLove the lapel size and shape on this coat. As always, great fit and details. Really, why don't they put the roll line on a coat or jacket? PITA. Does it really get cold enough there for a wool coat of this weight? It would be a shame not to get a lot of wear out of this gorgeous coat.
ReplyDeleteI just read your 7 part coat posts and I think I can top the iron story. I sit on a chair with wheels and years ago I had carpet in my sewing room. One day I propelled my self away from the machine with my feet. I ended up with a needle all the way through my foot. After driving myself to the ER, and sitting there for 3 hours saying there is a needle in my foot. They finally took X-rays, apologized and called in a surgeon to remove the needle. It truely went all the way through, I could feel it on the top and bottom of my foot. I now have hardwood floors. I can not sew with shoes on.
ReplyDeleteIt's beautiful. Just the right length and a gorgeous colour.
ReplyDeleteBeautiful coat Ms. Beth! I love the color (it's one of my favs!). You and Ms. Faye are the "coat queens", you love making and are extremely good at making them! Beautiful work!
ReplyDeleteYour coat is just perfection! I love the big lapels, the length and that divine colour. How perfect are those buttons? I really enjoyed all the inner details too, your tailoring is always so beautifully executed and very well explained. Thank you!
ReplyDeleteYour coat is stunning. Really really lovely. And, I just love all the details you posted -- especially the inner workings. Thank you!
ReplyDeleteBeautiful and the fabric is simply gorgeous!
ReplyDeleteIt's always great to see the inside secrets of a beautifully made coat. This is gorgeous, I really love the colour and am amazed that you found such perfectly matching buttons, they were made for each other!
ReplyDeleteI'll take it! Beautiful coat. Thank you for sharing all the lovely details.
ReplyDeleteI just discovered this post and I want to commend you on providing such detailed, helpful information and WOW -- what a gorgeous coat! I have skimmed this now but plan to read in more detail later tonight. I learn so much from these kinds of posts. Thank you for your generosity in taking the time to share.
ReplyDelete